 |
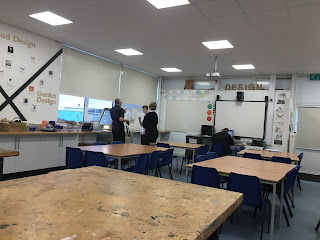
| The original look of our location |
Scenes 1 and 4 were filmed in our college's design technology classroom. Sam and I arrived early to begin setting up. First this began with us transferring all of the props into the room, most difficult being the screen and hospital bed from the college's sick bay. Starting early ensured we had plenty of time to move things around and set up our scene exactly as envisioned. There was a lot of moving around to do as we needed to completely clear that corner so as to make our scene look as realistically as a morgue as possible.
 |
| Sam setting up the screen |
 |
| The set up of the doctor's tools |
 |
| The final look of the morgue |
 |
| Experimenting with the lighting |
 |
Me writing details of the victim on the board
|
After setting up all of the props, Sam and I brought in all of our filming equipment. This included two cameras to capture more footage, and two tripods to ensure stable shots. Both were set up in preparation for the shoot. Once this was all done we practised with the cameras, lighting and filters. This extra preparation time prevented us from wasting the time we got with our actors later on in the day. We discovered that we really liked the level of brightness created by our 3 point lighting kit with a bit of natural light that escaped in through the blinds as it created the perfect dark and mysterious atmosphere we were hoping for. The blinds helped us control the amount of light that could escape into our scene, as did the aperture on our camera lenses. This practise time was also spent experimenting with filters. Morgue scenes are associated with dark and gloomy colours, so we used green and blue filters separately and together on the lights and the lenses. We eventually decided to film all of our shots normally and then again with a blue filter held over the camera lens, as it set the perfect mood. The colour blue connotes coldness and sadness and mystery. Morgues are notably cold and depressing places, and we wanted our doctor to come across as a creepy and mysterious character. However we wanted the option between plain and a blue filter, so shot with both.
 |
| Me filming a high angle shot of the body incision |
Halfway during the day we finally brought one of our actors in, Mr Howe. Our actress was unavailable until a couple of hours later so Sam and I made the decision to use a stand in, a friend of ours of similar size to our actress. This meant that during these hours we only filmed the shots that would not require seeing the actress' actual face, as waiting for the actress would have meant rushing some of our shots or possibly even having to miss some out. We also made sure to get all of the organ scenes out of the way as we knew they would take up the most time, but had the most potential to create some brilliant shots. Scene 1 took up the whole day, unfortunately leaving us with limited time at the end for scene. This lead us to make the decision to cut scene 4 down to one pan shot. For this we had luckily brought the dolly, just in case any decisions like this were made last minute. This shot did take a significant amount of attempts as we wanted the timing and the look of the shot to be perfect. Our actor had to leave early, and more the remaining half an hour whilst we still had our actress we filmed the close ups of her face and took any necessary photos for our double page spread and poster.
Overall Sam and I believe the film shoot went extremely well. We were very happy with the shots we got, despite being stuck for time at the end. We decided to act some extra shots as we absolutely loved the general look of the scene.


Great evidence of planning and organisation
ReplyDelete